Deepseek R1が登場しましたが、Open AIが提供するAPIが優れていることは言うまでもありません。
今日はOpen AIのRealtime APIを使って、リアルタイムオーディオウェブサービスを作ろうと思います。
1. Realtime APIとは?

OpenAIで2024年10月1日にリリースされたサービスで、リアルタイムの音声入力と出力をサポートしています。
以前は音声を使用してchatGPTと対話するためにWhisperのような音声認識モデルを使ってオーディオをテキストに変換し、それを送信した後、戻ってくるモデルの応答をテキスト音声変換を用いて出力する必要がありました。
この方法は思ったよりも遅延があります。
Realtime APIはオーディオ入力と出力を直接実装します。
GPT-4oモデルやWebsocket、WebRTCを使ってリアルタイムでオーディオ入出力を実現できます。
詳しくは公式サイトで確認してください。
2. Open AI Realtime Blocks

どれぐらい時間が経ったかわかりませんが、ある天使がAPIを実装してGitHubにオープンソースで公開してくれました。
ホームページもとても美しくて、vercelで作成されたSDKかと思いました。
制作者のホームページを紹介します。

インストールに進むと、yarnやnpmの代わりに必要な部分を持っていくようにと言っています。
コードもそのままです。
ざっと読んで必要な部分をプロジェクトに移せばいいです。
Classic、Dock、Siriなどさまざまな形式がありますが、その中でChatGPTバージョンが一番気に入りました。
3. 実装する (Ctrl + C & V)
これは実装というよりもコピー&ペーストに近いです。
まずはすべての依存関係をインストールしましょう。
選んだモデルは依存関係が1つだけでした。
yarn add framer-motion次にフックを追加します。
コード全体は文書のCreate the WebRTC Hookを確認してください。

"use client";

import { useState, useRef, useEffect } from "react";
import { Tool } from "@/lib/tools";

const useWebRTCAudioSession = (voice: string, tools?: Tool[]) => {
  const [status, setStatus] = useState("");
  const [isSessionActive, setIsSessionActive] = useState(false);
  const audioIndicatorRef = useRef<HTMLDivElement | null>(null);
  const audioContextRef = useRef<AudioContext | null>(null);
  const audioStreamRef = useRef<MediaStream | null>(null);
  const peerConnectionRef = useRef<RTCPeerConnection | null>(null);

省略...
正直、早く開発するために無思考で追加しました...
使用するモデルに応じて、中間のmodalitiesでaudioやtextを適切に追加、削除しましょう。
開発後にコンソール出力が嫌であればconsole.logもすべて削除してもかまいません。
そしてWebSocket生成用のセッションパスを作成します。
import { NextResponse } from 'next/server';

export async function POST() {
    try {
        if (!process.env.OPENAI_API_KEY){
            throw new Error(`OPENAI_API_KEY is not set`);

        }
        const response = await fetch("https://api.openai.com/v1/realtime/sessions", {
            method: "POST",
            headers: {
                Authorization: `Bearer ${process.env.OPENAI_API_KEY}`,
                "Content-Type": "application/json",
            },
            body: JSON.stringify({
                model: "gpt-4o-mini-realtime-preview",
                voice: "alloy",
                modalities: ["audio", "text"],
                // instructions:"You are a helpful assistant for the website named OpenAI Realtime Blocks, a UI Library for Nextjs developers who want to integrate pre-made UI components using TailwindCSS, Framer Motion into their web projects. It works using an OpenAI API Key and the pre-defined 'use-webrtc' hook that developers can copy and paste easily into any Nextjs app. There are a variety of UI components that look beautiful and react to AI Voice, which should be a delight on any modern web app.",
                tools: tools,
                tool_choice: "auto",
            }),
        });

        if (!response.ok) {
            throw new Error(`API request failed with status ${response.status}`);
        }

        const data = await response.json();

        // Return the JSON response to the client
        return NextResponse.json(data);
    } catch (error) {
        console.error("Error fetching session data:", error);
        return NextResponse.json({ error: "Failed to fetch session data" }, { status: 500 });
    }
}

const tools = [
    {
        "type": "function",
        "name": "getPageHTML",
        "description": "Gets the HTML for the current page",
        "parameters": {
            "type": "object",
            "properties": {}
        }
    },
    {
        "type": "function",
        "name": "getWeather",
        "description": "Gets the current weather",
        "parameters": {
            "type": "object",
            "properties": {}
        }
    },
    {
        "type": "function",
        "name": "getCurrentTime",
        "description": "Gets the current time",
        "parameters": {
            "type": "object",
            "properties": {}
        }
    },
];念のために言いますが、.env.localファイルにAPIキーの設定を忘れずに。
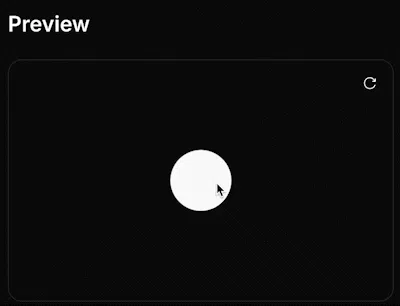
該当ドキュメントに移動するとchatgpt.tsxとpage.tsxがそのままあります。
それをそのまま使ってください。
私は以下のように設定しました。
import React, { useEffect, useState } from "react";
import { motion } from "framer-motion";
import useWebRTCAudioSession from "@/hooks/use-webrtc";

const ChatGPT: React.FC = () => {
  const { currentVolume, isSessionActive, handleStartStopClick, msgs } =
    useWebRTCAudioSession("alloy");

  const silenceTimeoutRef = React.useRef<NodeJS.Timeout | null>(null);

  const [mode, setMode] = useState<"idle" | "thinking" | "responding" | "volume" | "">(
    ""
  );
  const [volumeLevels, setVolumeLevels] = useState([0, 0, 0, 0]);

  ....省略
そしてpage.tsxも1つ作成しました。
import ChatGPT from "@/components/aiChat/AudioChatGPT";

export default function Page() {
  return (
    <main className="flex items-center justify-center h-screen">
      <ChatGPT />
    </main>
  );
}
これでテストをすると正常に動作することが確認できます。
まだダークモードがないため、svgの色をgrayに変更しました。

4. 感想
コストはオーディオ入力1分あたり0.06ドル、出力あたり0.24ドルです。
実感はわきませんが、今日はテストで少ししゃべっただけでも下記のようなコストがかかりました。

過去2か月間、streamTextで2ドルだったのが今日だけで1.5ドル...
当然、有料で使うよりもはるかに安いですが、思ったよりも高価です。
妻が英語学習用のGPTを実装してほしいと言っていたので、これで一度試してみる必要があります。


댓글을 불러오는 중...