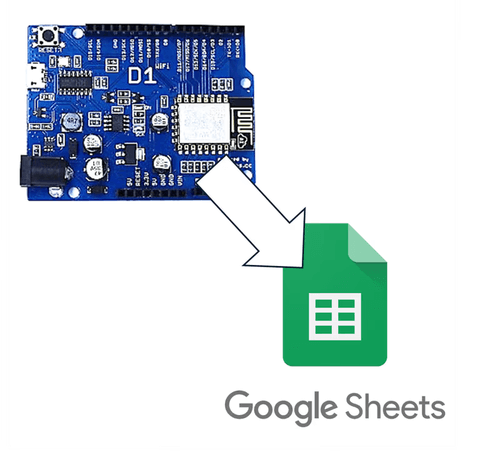
Today, we will create a Wi-Fi Stevenson screen that measures temperature and humidity and transmits data using Arduino ESP32.
This content is based on a script for a +1 session that will be conducted at school.
1. Materials
The materials are simple.
ESP32, DHT-22, three wires
First, to briefly explain the ESP32, it is an Arduino with a built-in Wi-Fi module.
However, it is much smaller than a standard Arduino.
2. ESP32 Pin Map

Uh oh?? The pin numbers seem odd?
This was also explained in the previous article; it is because the pin mapping changed when including the Wi-Fi module.

Here is the pin mapping for the ESP32 Arduino.
Fortunately, this one seems to almost match the GPIO pin numbers and names.
We plan to run the DHT-22 using the safe D4 pin among the following pins.

Arduino D pin | GPIO Number | Precautions | Function & Description |
|---|---|---|---|
D0 | GPIO0 | strapping: requires LOW or floating at boot | affects flash mode entry ([randomnerdtutorials.com][1]) |
D1 | GPIO1 (TX0) | USB serial conflict caution | UART0 TX for upload and debugging |
D2 | GPIO2 | strapping: requires LOW/floating at boot | on-board LED → affects boot |
D3 | GPIO3 (RX0) | USB serial conflict caution | UART0 RX, HIGH at boot |
D4 | GPIO4 | ★ Safe | Digital I/O, ADC2_CH0, touch enabled |
D5 | GPIO5 | strapping: requires HIGH at boot | PWM output during boot |
D6–D11 | GPIO6–11 | Absolutely Prohibited | Internal SPI Flash Pins |
D12 | GPIO12 | strapping: requires LOW at boot | ADC2_CH5, touch, affects boot |
D13 | GPIO13 | Safe | ADC2_CH4, touch enabled |
D14 | GPIO14 | Outputs PWM at boot, boot strapping possible | ADC2_CH6, touch enabled |
D15 | GPIO15 | strapping: requires HIGH at boot, PWM output | ADC2_CH3, touch enabled |
D16 | GPIO16 | Caution for PSRAM with Wrover module | UART2 default TX/RX (17/16) |
D17 | GPIO17 | Caution with Wrover module | UART2 default TX/RX (17/16) |
D18, D19, D21–D23, D25–D27, D32–D33 | Omitted | Safe | Supports digital, PWM, I2C, SPI, ADC/DAC |
D34, D35, D36(VP), D39(VN) | 34,35,36,39 | Input only, no pullup/pulldown | ADC1 channel (no additional features) |
3. DHT-11 vs DHT-22
Generally, the temperature and humidity sensor that comes with an Arduino is the DHT-11.
It is the one with the blue color, and it has a large error range of about 2 degrees.
Below is a summarized table of the performance of DHT-11 and DHT-22.
Item | DHT-11 | DHT-22 (AM2302) |
|---|---|---|
Appearance |  |  |
Temperature range | 0 to 50°C | -40 to +80°C |
Temperature accuracy | ±2°C | ±0.5°C |
Humidity range | 20 to 80% RH | 0 to 100% RH |
Humidity accuracy | ±5% RH | ±2~3% RH |
Resolution | Temperature: 1°C, Humidity: 1% RH | Temperature: 0.1°C, Humidity: 0.1% RH |
Measurement frequency | More than 1 second | More than 2 seconds |
Data transmission | Low speed | Low speed |
Size | Small | Slightly larger |
Price | Inexpensive | More expensive than DHT-11 |
Operating voltage | 3 to 5V | 3 to 5V |
Since a large error range makes the data unreliable, we decided to use the DHT-22 with lesser error.
If you want even more accurate temperature measurement, you can use a PT-100 thermometer, but it seems unnecessary for this purpose.
4. Installing CH340 Driver

You can see a chip inside the red circle in the photo above.
This is a chipset called CH340 made in China, and you can think of it as corresponding to the CPU in a computer.
Here's the official site link that provides the CH340 chip driver.
Download it and install it by just following the next buttons.
The above file includes drivers for all the following chips.
Note that MacBooks provide the driver for this chipset by default, so there is no need to install it.
CH340G, CH340T, CH340C, CH340N, CH340K, CH340E, CH340B, CH341A, CH341F, CH341T, CH341B, CH341C, CH341U5. Setting Up the Arduino IDE Board Manager
Now let's set up the board manager in the Arduino IDE.
Go to File > Preferences in Arduino IDE.

Copy and enter the following address in the Additional Board Manager URLs.
https://espressif.github.io/arduino-esp32/package_esp32_index.json

Then search for ESP32 in the board manager and install the one provided by Espressif Systems.

When you connect the Arduino to the USB port, the port is automatically detected.
Select the corresponding Arduino board for that port.

6. Connecting to Wi-Fi
Let's upload a simple example now.
Select File -> Examples -> HttpClient -> BasicHttpsClient to find the HTTP request example.

Now change only the SSID and PASSWORD sections in this example.
void setup() {

 USE_SERIAL.begin(115200);

 USE_SERIAL.println();
 USE_SERIAL.println();
 USE_SERIAL.println();

 for (uint8_t t = 4; t > 0; t--) {
 USE_SERIAL.printf("[SETUP] WAIT %d...\n", t);
 USE_SERIAL.flush();
 delay(1000);
 }
// Enter the Wi-Fi name in SSID, password in PASSWORD
 wifiMulti.addAP("SSID", "PASSWORD");
}
If the upload fails, try adjusting the upload speed.
Change Upload Speed to a slightly lower value in Tools for stable operation.

Now, make it connect to the example site, and it prints HTML on the serial monitor.
By this point, you should be about one-third done.

7. Connecting the DHT-22 Sensor
Now let's connect the DHT-22 sensor to the Arduino and receive temperature and humidity values.
First, find and install the library.
Search for the DHT sensor library and get the one made by Adafruit.

Open the examples from File->Examples, and find the temperature and humidity sensor example.
Try testing the sensor from among these examples.
The core code, excluding comments, is as follows.

#include "DHT.h"

#define DHTPIN 4 // Designate pin number
#define DHTTYPE DHT22 // DHT 22
DHT dht(DHTPIN, DHTTYPE);

void setup() {
 Serial.begin(115200); // Serial communication speed. Change to 115200
 Serial.println(F("DHTxx test!"));
 dht.begin();
}

void loop() {
 delay(2000);
 float h = dht.readHumidity();
 float t = dht.readTemperature();
 float f = dht.readTemperature(true); // Becoming Fahrenheit with true

 if (isnan(h) || isnan(t) || isnan(f)) {
 Serial.println(F("Failed to read from DHT sensor!"));
 return;
 }

 float hif = dht.computeHeatIndex(f, h); // Sensible temperature
 float hic = dht.computeHeatIndex(t, h, false);

 Serial.print(F("Humidity: "));
 Serial.print(h);
 Serial.print(F("% Temperature: "));
 Serial.print(t);
 Serial.print(F("°C "));
 Serial.print(f);
 Serial.print(F("°F Heat index: "));
 Serial.print(hic);
 Serial.print(F("°C "));
 Serial.print(hif);
 Serial.println(F("°F"));
}
After transmitting with Arduino, confirm the temperature output on the serial monitor.
Just by blowing on it, the humidity soared up to 100%.

Since we have solved the Arduino Wi-Fi and sensor connection, let's move on to setting up Google Sheets next.
8. Setting Up Google Sheets
Usually, I write posts myself, but setting up Google Sheets would make the article too long, so I’ll attach an article I wrote before.
Check the link below.
9. Sending a GET Request from Arduino
Now that the Google Sheets setup is complete, it's time to send a GET request from Arduino.
Use the example from the Wi-Fi connection above.
Just change the request address to the Google script.
The middle part is omitted for brevity.
#include <Arduino.h>
#include <WiFi.h>
#include <WiFiMulti.h>
#include <HTTPClient.h>
#include <NetworkClientSecure.h>

...

String host = "https://script.google.com/";
String googleScriptID = "my Google script ID";
String scriptUrl = "macros/s/"+googleScriptID+"/exec";
String queryString = "?value1='Hello'&value2='Testing!'";
String getReqUrl = host + scriptUrl + queryString;

void setup() {

 ...

 WiFiMulti.addAP("Wi-Fi name", "Wi-Fi password");

 ...
}

void loop() {
 NetworkClientSecure *client = new NetworkClientSecure;
 if (client) {
 client->setCACert(rootCACertificate);
 {
 HTTPClient https;
 Serial.print("[HTTPS] begin...\n");
 if (https.begin(*client, getReqUrl)) { // Modify this part

 ...

 }
 }}
}
Executing this shows data flowing to the spreadsheet.
The final step is to retrieve and transmit data from the DHT-22

10. Combining the Code

Now let's combine the two codes.
If combining the code is too difficult, handing it over to AI without complicating it is also recommended.
First, I changed the loop code of DHT-22 to a function that returns a structure called Weather.
#include "DHT.h"

#define DHTPIN 4
#define DHTTYPE DHT22

DHT dht(DHTPIN, DHTTYPE);

void setup() {
  Serial.begin(115200);
  dht.begin();
}

struct WeatherData {
  float humi;
  float temp;
  float heat;
  bool valid;
};

WeatherData getWeather() {
  WeatherData data;
  data.humi = dht.readHumidity();
  data.temp = dht.readTemperature();

  if (isnan(data.humi) || isnan(data.temp)) {
    Serial.println(F("Failed to read from DHT sensor!"));
    data.valid = false;
    return data;
  }
  data.valid = true;
  data.heat = dht.computeHeatIndex(data.temp, data.humi, false);

  Serial.print(F("Humidity: "));
  Serial.print(data.humi);
  Serial.print(F("%  Temperature: "));
  Serial.print(data.temp);
  Serial.print(F("°C "));
  Serial.print(F("°Heat index: "));
  Serial.print(data.heat);
  Serial.print(F("°C "));
  return data;
}
Properly distribute the required parts and merge them into the httpsClient code.
Let's combine them now.
#include <Arduino.h>
#include <WiFi.h>
#include <WiFiMulti.h>
#include <HTTPClient.h>
#include <NetworkClientSecure.h>
#include "DHT.h"

...
Certificate omitted
...

void setClock() {
  ...
}

#define DHTPIN 4
#define DHTTYPE DHT22

WiFiMulti WiFiMulti;
DHT dht(DHTPIN, DHTTYPE);
char* SSID = "Wi-Fi name";
char* PASSWORD = "Wi-Fi password";
String host = "https://script.google.com/";
String googleScriptID = "my Google script ID";
String scriptUrl = "macros/s/"+googleScriptID+"/exec";

struct WeatherData {
  ...
};

WeatherData getWeather(); // Declared in advance to avoid errors


void setup() {
  dht.begin();
  Serial.begin(115200);
  WiFi.mode(WIFI_STA);
  WiFiMulti.addAP(SSID, PASSWORD);
  Serial.print(F("Waiting for WiFi to connect..."));
  while ((WiFiMulti.run() != WL_CONNECTED)) {
    Serial.print(F("."));
  }
  Serial.println(F(" connected"));
  setClock();
}

WeatherData getWeather() {
    ...
}


void loop() {
  NetworkClientSecure *client = new NetworkClientSecure;
  if (client) {
    client->setCACert(rootCACertificate);
    {
      HTTPClient https;
      WeatherData data = getWeather();
      if (!data.valid){
        Serial.println(F("Cannot obtain weather information."));
        Serial.println("Waiting 10s before the next round...");
        delay(10000);
        return;
      };
      Serial.print("[HTTPS] begin...\n");
      String queryString = "?value1=" + String(data.humi) + "&value2=" + String(data.temp) ;
      String getReqUrl = host + scriptUrl + queryString;
      if (https.begin(*client, getReqUrl)) {  // HTTPS
        Serial.print("[HTTPS] GET...\n");

        int httpCode = https.GET();

        if (httpCode > 0) {
          Serial.printf("[HTTPS] GET... code: %d\n", httpCode);
        } else {
          Serial.printf("[HTTPS] GET... failed, error: %s\n", https.errorToString(httpCode).c_str());
        }
        https.end();
      } else {
        Serial.printf("[HTTPS] Unable to connect\n");
      }
    }
    delete client;
  } else {
    Serial.println("Unable to create client");
  }
  Serial.println();
  Serial.println("Waiting 10s before the next round...");
  delay(10000);
}
After doing this, if the humidity, temperature, and Get request code 200 show up on the serial monitor, it's successful.
Then you can check it by accessing the spreadsheet.

11. Additional Tasks
If you also want to record the apparent temperature, modify the Google script.
You can add variables or change variable names in the parameter parsing section.
...
for (var param in e.parameter) {
  Logger.log('In for loop, param=' + param);
  var value = stripQuotes(e.parameter[param]);
  Logger.log(param + ':' + e.parameter[param]);
  switch (param) {
    case 'humi':
    rowData[2] = value; // value1 in column C
    result = 'Humidity recorded';
    break;
    case 'temp':
    rowData[3] = value; // Humidity in column D
    result += ', Temperature recorded';
    break;
    case 'heat':
    rowData[4] = value;
    result += ", Apparent temperature recorded";
    break

    default:
    result = "Unsupported parameter.";
  }
...
Of course, this requires changing the query string in the Arduino code as well.
Since it is a personal project, doing this is for future maintenance or just personal preference.
12. Review
In previous experiments with students, we had the following data:
Data gaps in the middle were caused by power being cut off at night...
Nonetheless, having an automatic data collection system like this is immensely beneficial as we only need to analyze the data.

It looks empty when you see only the results, but writing it out in detail makes the article extremely long.
We plan for the first 3 hours of the 16+1 session to cover C language, followed by 2 hours of Arduino temperature and humidity sensor, and the rest for a personal project. I am worried about whether time will be enough.
I hope the well-prepared class ends successfully and we welcome the summer break.


댓글을 불러오는 중...