While there are many resources on implementing login, there was little on updating session information.
Here's a look at how to update session information.
Once again, let's refer to the NextAuth documentation.

The order for updating session information is as follows.
Update session and trigger it using useSession's update
Reset JWT according to the update trigger in authConfig
Refresh the page after updating
Now, let's look at the code first.
1. Session Update
The example from the official documentation is as follows.
import { useSession } from "next-auth/react";

export default function Page() {
  const { data: session, status, update } = useSession();

  if (status === "authenticated") {
    return (
      <>
        <p>Signed in as {session.user.name}</p>
        // Send updated values to the server side
        <button onClick={() => update({ name: "John Doe" })}>Edit name</button>
        // Assume that the value has already been updated on the server side. Just trigger an action // All
        `useSession().data` is updated.
        <button onClick={() => update()}>Edit name</button>
      </>
    );
  }

  return <a href="/api/auth/signin">Sign in</a>;
}
If you want to keep it simple, you can pass an object as a parameter to update.
I tried applying it to my website as well.
I simplified unnecessary code and added comments.
"use client";

import { useSession } from "next-auth/react";
import { useRouter } from "next/navigation";

export default function Profile() {
  const router = useRouter();
  const { update } = useSession();

  async function handleSubmit(e: React.FormEvent<HTMLFormElement>) {
    e.preventDefault();

    // Create form data and inject data
    const formData = new FormData();
    formData.append("nickName", value);

    // Update backend via API fetch
    const res = await fetch("/api/editProfile", {
      method: "POST",
      body: formData,
    });
    const resJson = await res.json();

    // If successful, update session using update and trigger action
    if (resJson.success === "success") {
      // Create data in object format and update
      const updateObj: Record<string, string | boolean> = {};
      userInputTable.forEach((each: userInputTableObj) => {
        updateObj[each.name] = each.value as string;
      });

      // Await update and refresh afterward
      await update(updateObj);

      // Refresh for navbar update with session update
      router.refresh();
    }
  }
  return (
    <form onSubmit={(e) => handleSubmit(e)}>
      <input
        // userInput.value is roughly set with useState
        value={userInput.value}
        onChange={(e) => handleChange(e)}
      />
        <button type="submit">Submit</button>
    </form>
  );
}
The key is to update session information by passing an object to update.
Next, let's refresh the token with the updated session.
2. AuthOptions
The official documentation is roughly as follows.
In NextAuth parameters, provide jwt options with callbacks.
If an update trigger occurs and session.name exists, update the token.
...
export default NextAuth({
  // Omitted ...
  callbacks: {
    jwt({ token, trigger, session }) {
        // Session can be an arbitrary object, so validation is needed
      if (trigger === "update" && session?.name) {
        token.name = session.name
      }
      return token
    }
  }
})
There's not much to change here, so I applied it as is.
Once this is done, the session update is complete.
3. Testing
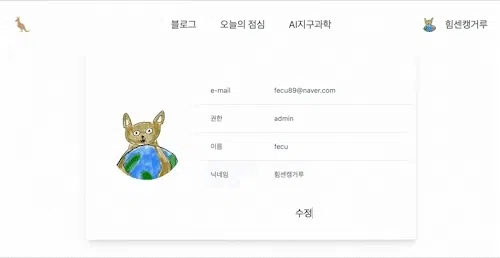
Now, let's test by changing the profile nickname after login.
I checked if the profile in the navbar, implemented with SSR, correctly updates as the nickname changes.
It seems to work well.
4. Review

Implementing session updates was easier than expected.
Despite extensive searches, it always came back to the official documentation.
If things don't work well, I recommend reading the official documentation thoroughly first.


댓글을 불러오는 중...